Dirty Pour Soap Challenge

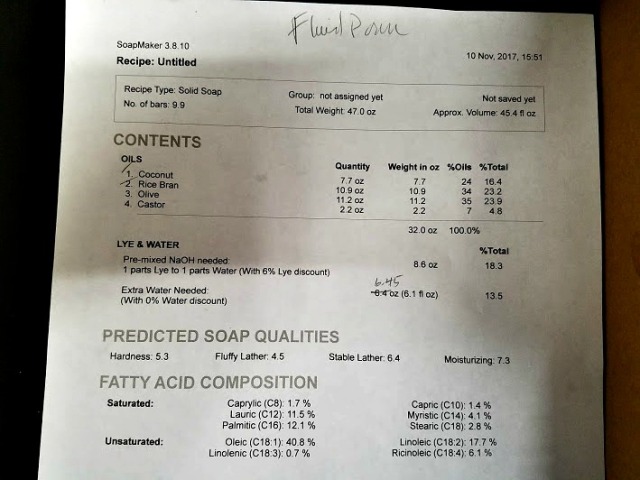
Back with Amy Warden’s soap challenge again, this one adapted from the dirty pour fluid acrylic technique. I used a Bastille recipe with olive oil, rice bran oil, coconut oil and castor to keep things fluid.

dirty pour recipeI used several color micas that seemed like they would look good, but I’m not so happy with the final product colors. I’ll try again with different colors. I used Apricot Freesia fragrance since I know it does not accelerate (learned this from an early soap challenge with Amy.)  I mixed oils and lye around 110 F and stick-blended to emulsion.

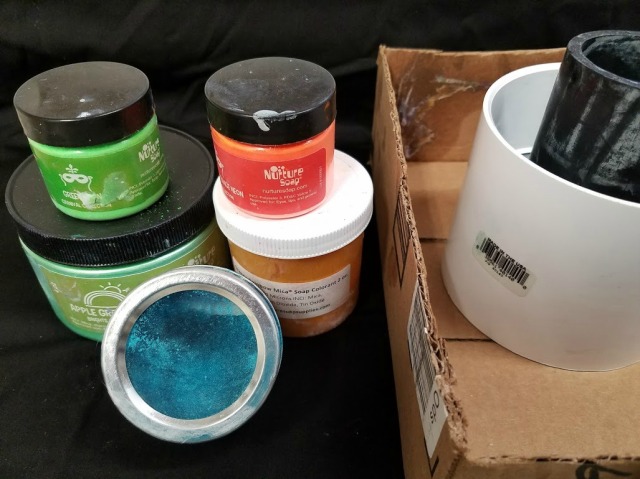
The slab mold is cut from a cardboard shipping box; I really need to get a real slab mold!  Here are my mold, couplers for pouring and the micas I used.  The micas teal, apple green and neon green, orange and neon orange and purple (which I forgot to put in the picture.)  I added a bit of pearly white (Brambleberry) to the plain batter.

dirty pour tools

And just the mold and couplers.  This cardboard mold was a bear trying to line.  As you can see, it leaked anyway.

dirty pour mold

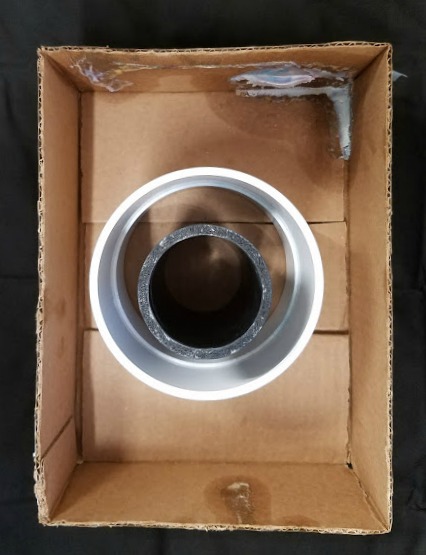
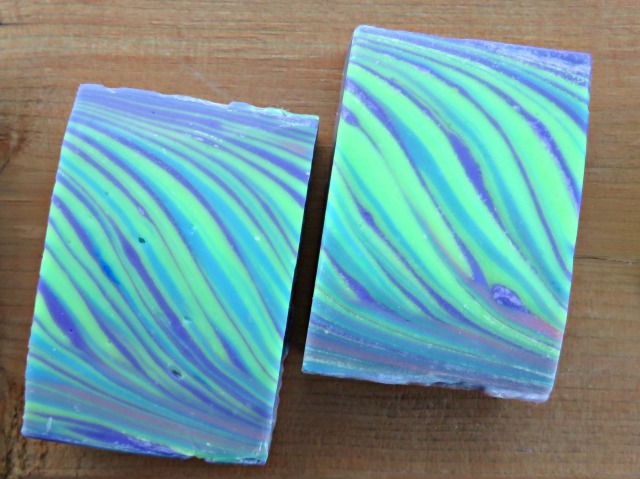
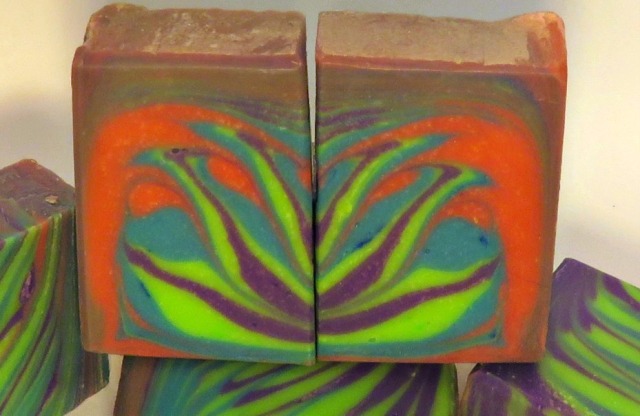
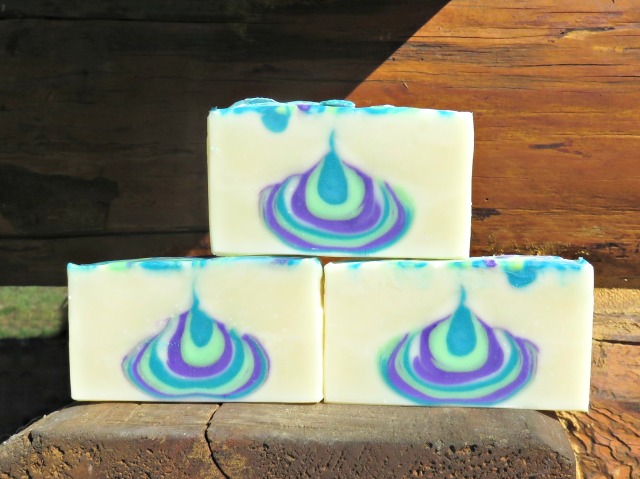
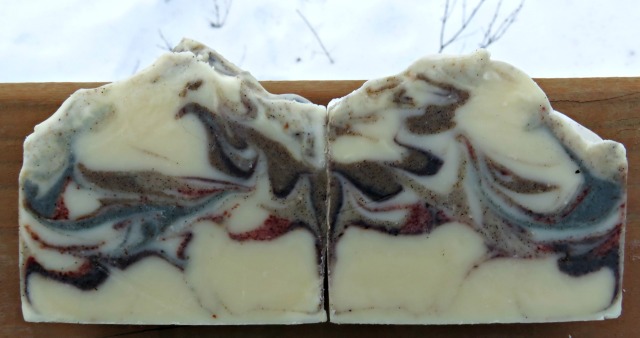
I poured the green and teal in the outer coupler, the orange and purple in the smaller one.  Part way through, I poured the plain soap into the corners.   I finished pouring the colors and let the couplers drip onto the soap.

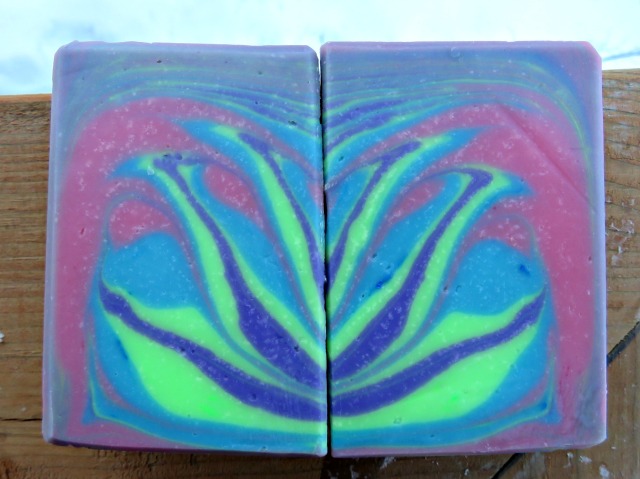
I think my batch was too deep to get really good movement when tilting it.  It stayed nicely fluid though, but I will use a smaller batch next time.  I think a shallower batch will work better.

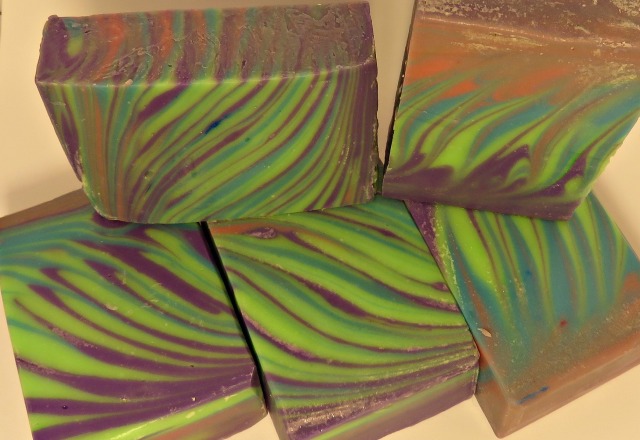
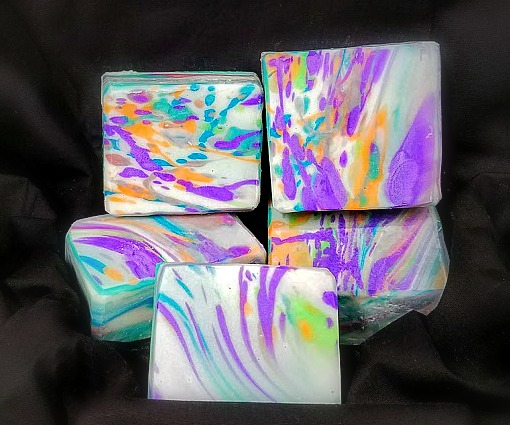
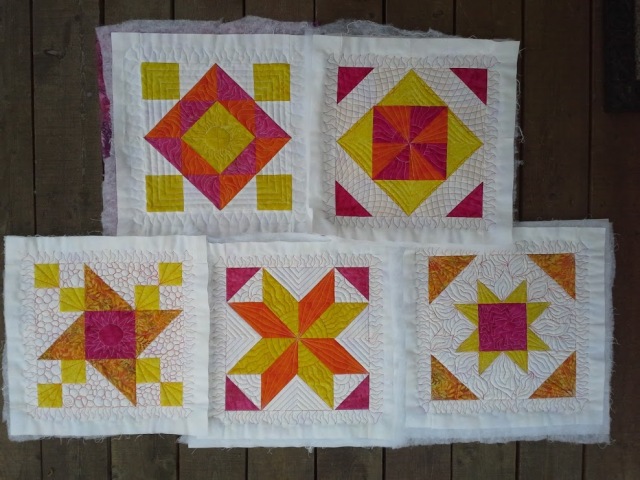
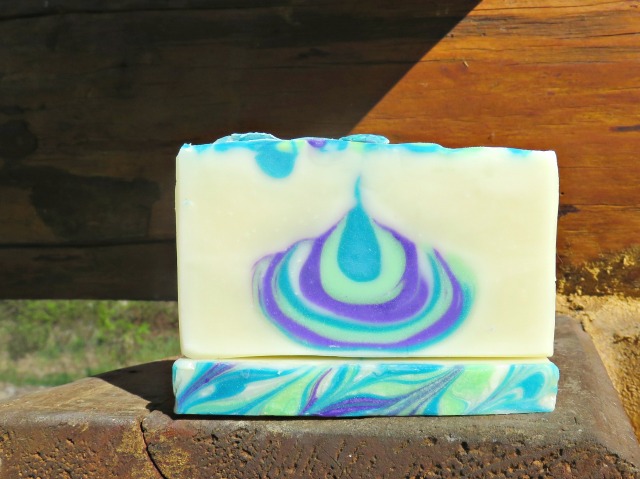
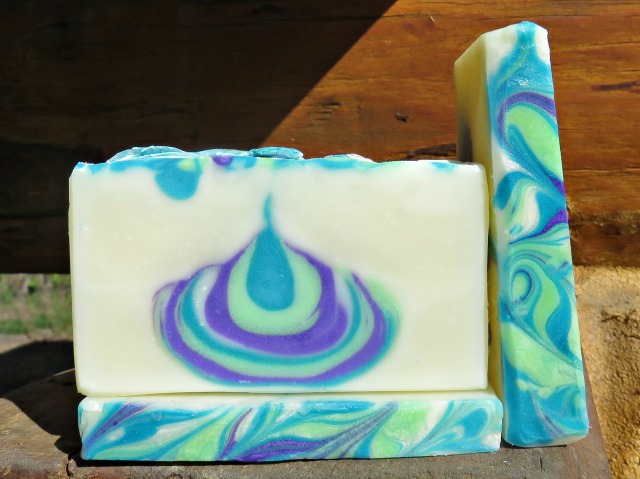
So, here it is.  Not bad for a first try and rushing to finish.  Already thinking about the next one!

Beautiful plants

plantain drying
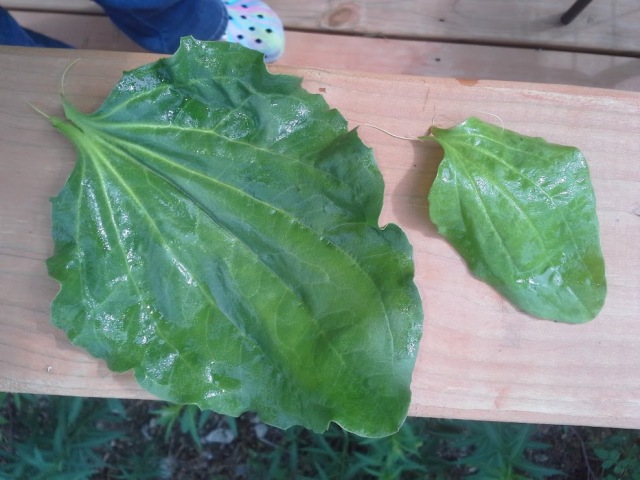
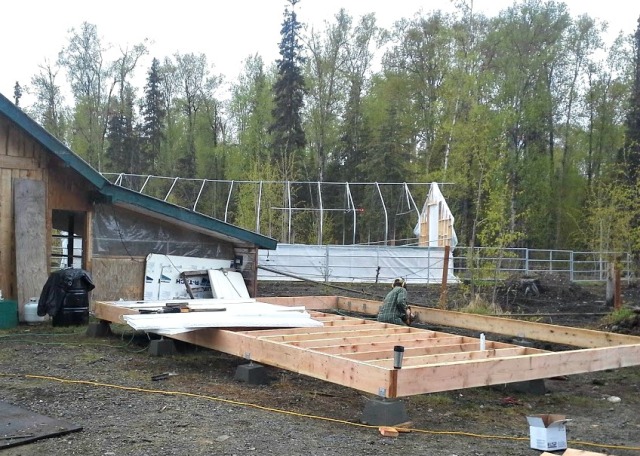
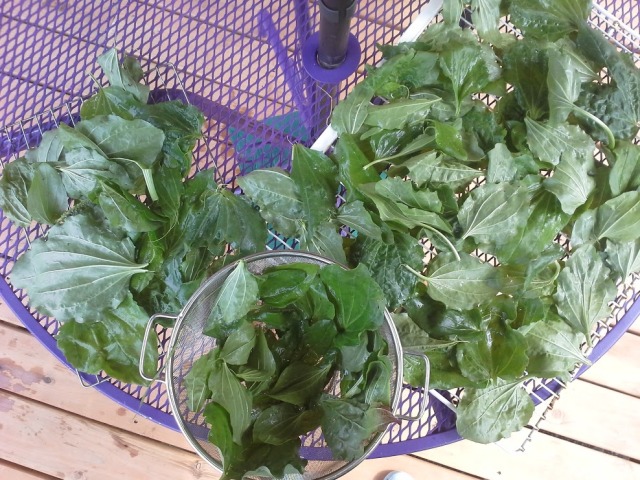
I just took a little meander around my yard and gardens, picking plantain.  This will be used for salves and creams.  Right now, it’s drying on the back deck before I infuse it into olive oil.
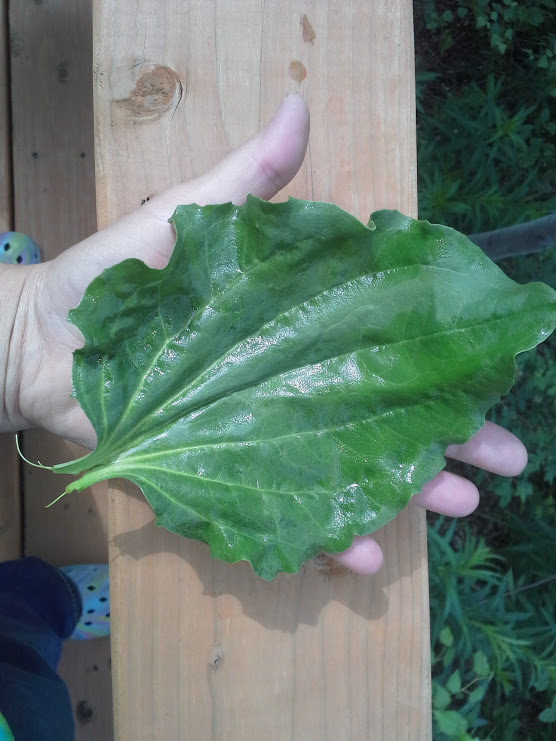
Plantain is an amazing plant.  It grows in the most unlikely places.  Gravel, walkways, parched spots?  Check!  Give it a little love and space and water, and it loves you back with lush huge leaves.

giant plantain leaf

Here’s a a leaf from a plant in the high tunnel and a leaf grown outside with no  care from me.  (I moved an outside plant into the high tunnel earlier this summer.)  They both have the same qualities, but the plants are loving the easy living with plenty of space and water.  plaintain big and little

It happily soothes abused skin along with its friends calendula, lavender, comfrey and St John’s Wort, just to mention a few.   Plantain is also very helpful for soothing bug bites and itchy skin.  I keep a jar of the salve in my car and next to my chair.  It’s that good!


Sewing…one of my happy places.

I am working on a new quilting project this year.  It’s called Machine Quilting Block Party  (MQBP) with Leah Day.  Leah is a genius young woman and has a gift for teaching quilting.  You can find her here.  leah day quilting

MQBP is a block of the month project, so small do-able monthly projects instead of big projects that can overwhelm.

It’s June and we are half way through.  On to the pictures!  These are the first five blocks sewn and quilted.  I am using the “class” colors and following all directions for this first group.  I love the bright, sunny colors!

mqbp 5 blocks

I wanted to do this pattern in cooler colors and the one on the left is what I came up with.

mqbp color study 1 & 2

Not really pleased, so I continued to explore more color combos.  I used Joen Wolfrom’s tips on color from her Craftsy class “Colorplay.”   Here are the new colors.  I like it!


mqbp p,f,g quilted

What a difference quilting makes!

mqbp purple,fushcia,green

Here are two of the same blocks, different colors.  My quilting improved by the time I got to the second color blocks.   I love them both.

mqbpfpg 2 blocks

I’ll be updating this post as the year and new blocks come along.  Thanks for stopping by!

Soap Challenge (again!)

The Great Cakes Soapworks May Challenge is a teardrop soap.  Intriguing, yes?

2016 teardrop challenge

I used a Bastille recipe that I know traces slowly as the success of this look depends on the batter being fluid through the pour.   I didn’t get any photos during the pouring since I was pouring and didn’t stop to snap pics.   I poured about a third of the plain soap, then poured s l o w l y, tiny little strips of color layered over each other.  After the colors are layered, you simultaneously and s l o w l y pour the rest of the plain batter down each side.  With luck, you’ll get a raindrop or teardrop in the middle of the soap.

I used Mad Oils Maniacal Pea green mica, Vibrance Teal and Purple from Nuture Soap.  The white batter is the natural color from the oils.  Scented with Energy from Majestic Mountain Sage.  Three of my favorite suppliers!  The soap is made with olive oil, coconut oil and castor oil…simple and awesome.

This looks like a raindrop to me, so Alaska Raindrop it is.

3 teardrops 2016

teardrop 2 2016

New Girl workshop!

Finally, I am getting a new workspace.  I have massively grown out of my soap workspace and my sewing has taken over our guest cabin.  After much thinking, figuring and sweating over the decision, I decided to make the leap to build my own space.  One end of the building will be for my soap and body care things.  The other side will be a sewing and design studio.  If we ever sell this place, we will have his and her shops!

karens shop, started may 9,2016

Day two.  A lot of progress!  It looks like a building.

karens shop day two

Every construction project needs a building inspector!

karens shop, building inspector

Day three.  A roof and now won’t leak.

karens shop day 3

Day four.  Metal roof on, windows and middle divider started.  This is exciting!  I can “see” where my tools and workspaces are.  Can’t wait!

karens shop day 4

Glaciers Soap…

Time for another soap challenge with Amy Wardens’ Great Cakes Soap Challenge!  (Final soap is at the bottom of post!)   This month’s  theme is  Winter Wonderland (must have an element of winter/snow)  and there are two categories.   “Natural” colorants and scents is one and the other is “synthetics” ingredients.  I’m working within the naturals category.

Being so close to Denali, I am hoping to capture the look of glaciers grinding down the mountains.  I am fascinated by the colors in glaciers and  the different rocks that become part of those rivers of ice.

Embed from Getty Images

30C6B5D9-97C8-ED18-5C8B28B22EB51FEC[1]

This is a photo of Denali and some glaciers from the National Park Service.

I used alkanet, indigo, rose hip powder, kelp (I’ve tested kelp in soap in the past.  It initially has a distinct “oceany” scent, but it fades over cure time), dried peppermint leaves, and vanilla bean seeds as glacier colors.  The vanilla bean seeds give a look of gravel within the colors.  I added a touch of white kaolin clay, tussah silk and coconut milk powder to the batter. Tussah silk and coconut milk is so luxurious in soap, I add it to all my soaps.

I wanted an outdoor, fresh scent.  I used  an essential oil blend of spearmint, lavendin, Siberian fir, cedar wood, eucalyptus, and lemongrass.

My recipe is olive oil (67%), coconut, palm kernel, and castor.  One of my requirements of my soap is that it feel luxurious and luscious on your skin.  This much olive oil tends to make for a long cure time, but it’s worth it!

My first test batch turned out well, but not quite the look I wanted.feb 16 soap challenge #1

Batch two.   I was more confident, so made a full size batch.  Because the first batch was a bit soft, I reduced the Olive oil an bit and added some illippe butter to help with the hardening  of this batch.  Illippe butter is also white, so it will help with the look of snow.  For this one, I poured about ½ to 2/3 of my plain batter into my tilted mold.  I then poured down the lower side of the mold alternating dark and light batter.  I then tilted the mold to the other side and finished pouring the colors.  I did a bit of a hanger swirl and topped off the batter with the rest of the plain soap.  This batch stayed very nicely workable for a long time so had to give it a few minutes to thicken before I could finish the top.

soap challenge 216, glaciers
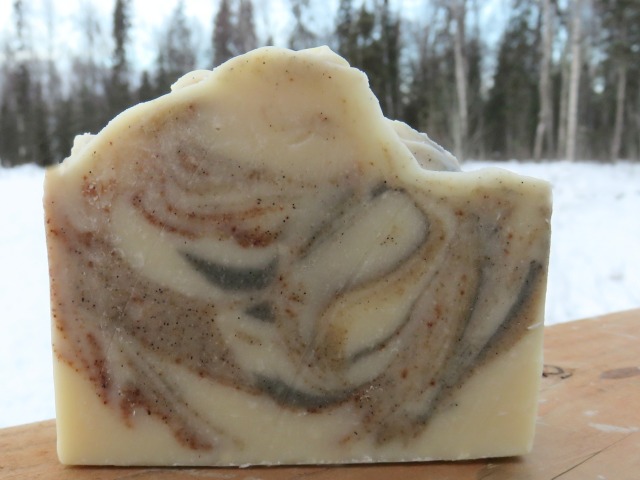
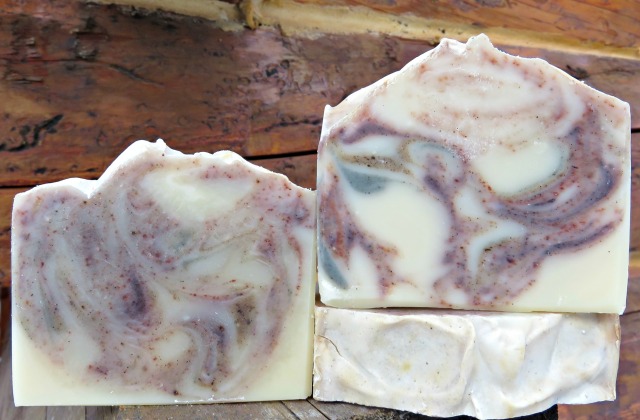
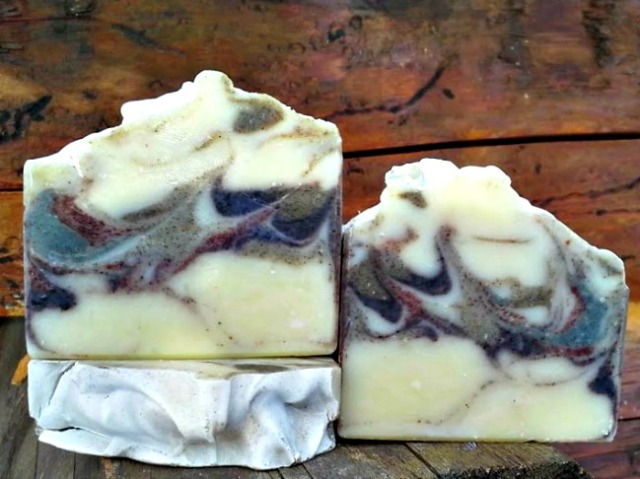
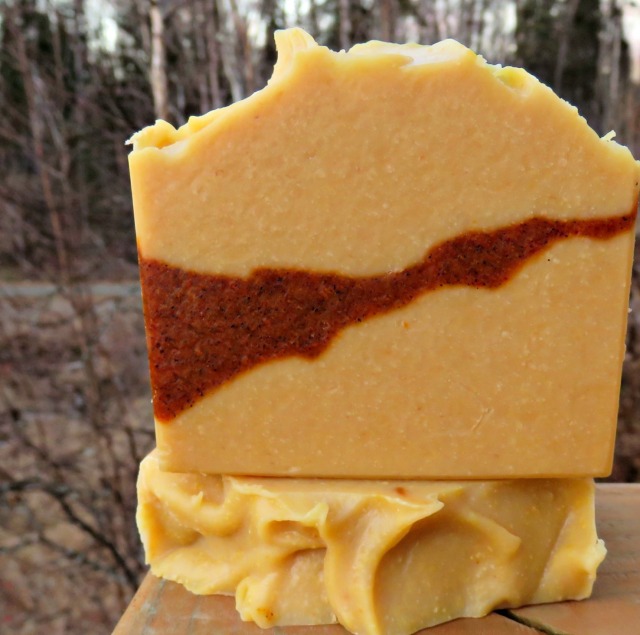
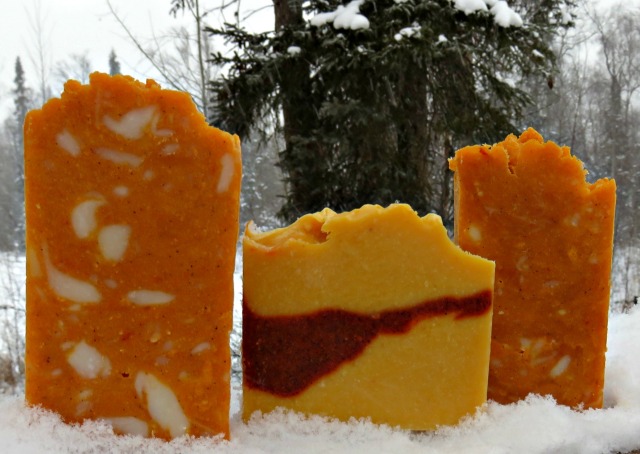
I really like this one, but I may make one more (searching for the Holy Grail here!) trying to perfect my soapy glaciers.  The scent is fabulous, btw.

So, I did make another batch.  Instead of hanger swirling, I did a spoon swirl.  Saponifying as I type.  Tomorrow, the cutting!

Well, batch three did not turn out as I’d hoped.    The batter was too liquid to get the definition of color I wanted.  About half the bars in this batch are more like the bar on the the left.  Nice, but not as dazzling as I’d hoped.feb 2016 challenge batch 3

Here’s a picture of all three batches.  From left to right, batch #1, #2, and #3.feb 2016 soap challenge 3 soaps

So batch two it is.  (For my official entry photo)feb soap challenge


January 2016 Challenge

Update February 14, 2016.  Woo Hoo!  I won a Sponsor’s Choice award for this soap!  Thank you Majestic Mountain Sage!

A new soap technique challenge with Amy Warden and Great Cakes Soapworks.  Called the circling Taiwan Swirl (not too catchy, but it works) I only made one batch for this challenge.  It’s being judged on the “lotus” that can show up on one end of the loaf.  I personally like the the other parts of the swirl better.  (but, I’m not in charge ;*)

I used a bastile recipe very high in olive oil so it would stay workable.  I used purple, neon green,  pink and blue micas to color my batter.  I used a lavender, orange, patchouli blend to scent this.  It stayed quite liquid and I really love the swirls on the other bars.   (I can’t cut straight to save my life!  You’ll see in the pictures.)

I waited till the very last minute (literally) to submit this; I was waiting for the sun to come up.  The sun did not cooperate, so I used a light box to take photos.  So, the colors are not as good as they would be outdoors.   (The pink looks orange here.)  Anyway, I love swirls and neon green and the other colors

Taken outside.

taiwan outside 2


These are the most true to color.


taiwan middle bars

I had removed the original pics taken in a light box as the colors were really off.  I decided to put them back as a comparison of natural light and artificial light.  What a difference!

tiwan circle challenge

taiwan 3

New from old(er)

Lots of blowing snow today.  Instead of driving the highway into Wasilla to work, I preferred to live another day.  Staying home and will make up the day later.

An update on the carrot soaps I made a few weeks ago.  All INCREDIBLE soap!  So luscious on the skin.  But… batch three had lather just a bit more yellow than I wanted.  (batch three below)carrot 3

So, even though I loved the striking look of this soap, I decided to rebatch it.  Rebatching soap involves shredding or grating it and melting down to add more ingredients or use in another soap.  Since I wanted to tone down the yellow, I added the shredded soap to a new batch of luxurious plain soap.  Then the whole shebang sat in the crockpot to soften and meld together.  Still very beautiful, just different.  Annatto seed and carrots are what give it this beautiful color.  I like it better now!

carrot rebatched pretty11.19.15

Testing Soap Additives

People in soaping groups are always looking for info on how soap additives behave and the right amount to use.  I tested some additives today to see how these perform and  if I want to incorporate them into my soaping work.

My recipe is olive oil 70%, palm kernel oil 23%, and apricot kernel oil 7% with a 6% superfat.   My soaping temperature was about 100 – 105.  Totally awesome recipe and it stays fluid for the 10 – 15 minutes it took me to measure and mix the samples.

Additives tested:

  • Indigo
  • kelp
  • vanilla powder
  • pearly white mica (Brambleberry)
  • honey powder
  • carrot powder
  • anatto powder
  • alkanet
  • marshmallow powder
  • mica dribble
  • control (no additive)

Each additive was a measured 1/4 tsp per (about) 4 oz batter.  The one exception was one kelp at 1/4 tsp and one at 1/2 tsp.   Additives were added dry to batter and whisked in, except a couple that wanted to clump were stick-blended.   The honey powder was mixed with a little water (1/2 tsp) and then batter added and mixed.

My shop is not heated so these will not gell and none are fragranced.  I should have done another round of samples and gelled them; a job for another day!

Here are pics of just poured soap samples.

ADDITIVE TEST 10.17.15ADDITIVE TEST 2, 10.17.15

Tomorrow I’ll unmold and take more pictures.  Then, a four week cure and, after that, I’ll lather up and see how they do when used.